Welcome to the Ryobi Pressure Washer Manual! This guide provides essential information for safe and effective operation, covering assembly, features, and maintenance to ensure optimal performance.
1.1 Importance of Reading the Manual
Reading the Ryobi Pressure Washer Manual is crucial for ensuring safe and effective operation. It provides detailed safety guidelines, assembly instructions, and maintenance tips to prevent accidents and prolong the unit’s life. Proper understanding of the manual helps you master the machine’s features and troubleshooting solutions, ensuring optimal performance and longevity.
1.2 Overview of Ryobi Pressure Washer Features
The Ryobi Pressure Washer is designed with advanced features for efficient cleaning. Models like the RY1419MTVNM and RPW120B offer high-pressure output, electric convenience, and lightweight designs. Key features include adjustable pressure settings, detergent tanks for easy soap application, and multiple nozzle tips for various cleaning tasks. These washers are built for durability and ease of use, with ergonomic handles and portable designs. They also prioritize energy efficiency and safety, ensuring reliable performance for both residential and light commercial use. These features make the Ryobi Pressure Washer a versatile and powerful tool for tackling tough cleaning jobs effectively.

Safety Guidelines
Adhering to safety guidelines is crucial when operating your Ryobi Pressure Washer to prevent accidents and ensure optimal performance. Always wear proper protective gear and maintain a safe environment.
2.1 General Safety Precautions
Always follow general safety precautions when using your Ryobi Pressure Washer to minimize risks. Wear protective eyewear and gloves to avoid injury from debris. Ensure the area is clear of obstacles and flammable materials. Avoid spraying electrical outlets, sensitive electronics, or plants. Never use the pressure washer near open flames or sparks. Keep children and pets away during operation. Store the unit in a dry, secure location out of reach of unauthorized users. Regularly inspect hoses and connections for damage or leaks. Avoid using the pressure washer in extreme weather conditions or on unstable surfaces. Follow all instructions carefully to ensure safe and effective operation.
2.2 Ground Fault Circuit Interrupter (GFCI) Requirements
Always use a Ground Fault Circuit Interrupter (GFCI)-protected outlet when operating your Ryobi Pressure Washer. This critical safety measure helps prevent electric shock, especially in wet environments. A GFCI outlet monitors electrical currents and trips if it detects a ground fault, protecting users from potential hazards. Ensure the outlet is installed correctly and functioning properly before use. Test the GFCI periodically by pressing the “Test” button to confirm it works. Never bypass or disable the GFCI feature, as it is essential for safe operation. Using a GFCI-protected outlet is mandatory to ensure compliance with safety standards and to protect against electrical accidents.
2.3 Personal Protective Equipment (PPE)
Always wear appropriate Personal Protective Equipment (PPE) when operating the Ryobi Pressure Washer to minimize injury risks. Safety glasses or goggles are essential to protect your eyes from debris and chemical splashes. A face mask can prevent inhalation of dust or detergent particles. Wear gloves to improve grip and protect your hands from cuts or abrasions. Closed-toe shoes and long pants are recommended to safeguard against high-pressure streams or sharp objects. Ensure PPE fits properly and is in good condition. Never operate the pressure washer without wearing the necessary protective gear, as this can lead to serious injuries, including eye damage or skin lacerations. Proper PPE use is crucial for safe operation.
Product Overview
Ryobi pressure washers offer powerful cleaning solutions with advanced features like adjustable pressure, detergent injection, and durable construction, designed for both residential and commercial use effectively.
3.1 Key Features of Ryobi Pressure Washers
Ryobi pressure washers are equipped with adjustable pressure settings, allowing users to customize cleaning power for various surfaces; They feature detergent injection systems for enhanced cleaning efficiency and sturdy, compact designs for easy mobility. Many models include interchangeable nozzles for versatility in cleaning tasks, from delicate surfaces to heavy-duty jobs. With high PSI ratings and durable pumps, these washers deliver consistent performance. Additional features like built-in hose reels and ergonomic handles enhance user convenience, making Ryobi pressure washers a reliable choice for both residential and light commercial cleaning needs.
3.2 Model-Specific Information (e.g., RY1419MTVNM, RPW120B)
Each Ryobi pressure washer model offers unique features tailored to specific cleaning needs. The RY1419MTVNM boasts a brushless motor for increased reliability and a 1900 PSI rating, ideal for heavy-duty tasks. The RPW120B, designed for lighter applications, delivers 1200 PSI with a compact, lightweight frame. Both models include adjustable nozzles and detergent compatibility for versatility. Understanding these differences helps users select the best model for their tasks, ensuring optimal performance and efficiency. Model-specific details are crucial for proper operation and maintenance, as outlined in the manual.
3.3 Technical Specifications
Ryobi pressure washers are built with high-quality components, ensuring durability and performance. Key specifications include PSI ratings ranging from 1200 to 3000 PSI, depending on the model, to tackle various cleaning tasks. The motor is designed for efficient power delivery, while the pump ensures consistent water flow. Weight varies between 20 to 60 pounds, offering portability without compromising strength. These units are ETL certified and meet CARB standards, ensuring safety and environmental compliance. Technical details like cord length, hose diameter, and accessory compatibility are also provided to help users optimize their cleaning experience.

Assembly and Installation
This section guides you through unboxing, inventorying parts, and assembling your Ryobi pressure washer. Follow step-by-step instructions for a proper setup to ensure optimal performance.
4.1 Unboxing and Inventory of Parts
Upon receiving your Ryobi pressure washer, carefully unpack all components from the box. Verify the included items match the parts list in the manual. Typically, you’ll find the main unit, high-pressure hose, spray gun, lance, nozzles, detergent tank, and quick-connect couplers. Inspect each part for damage or defects. Organize the components to ensure nothing is misplaced during assembly. Familiarize yourself with the hardware to streamline the setup process. If any parts are missing or damaged, contact Ryobi customer support immediately for assistance. Proper inventory ensures a smooth assembly experience.
4.2 Initial Setup and Assembly Steps
Begin by attaching the handle to the main unit using the provided bolts. Tighten securely but avoid overtightening. Next, install the hose reel by aligning it with the mounting brackets and securing it with the included hardware. Connect the high-pressure hose to the pump and spray gun, ensuring all fittings are tightened properly. Attach the lance to the spray gun and insert the desired nozzle. Finally, connect the detergent tank and ensure all connections are leak-free. Refer to the parts diagram for visual guidance. Double-check all assemblies before powering on the unit to ensure safe and proper operation.
4.3 Hose Reel Assembly and Connection
Mount the hose reel on the designated bracket by aligning the holes and securing it with the provided screws. Tighten firmly to ensure stability. Thread the high-pressure hose through the reel’s guide to prevent tangles. Connect one end of the hose to the pump outlet and the other to the spray gun. Ensure all connections are tightened properly to avoid leaks. After assembly, pull out a small portion of the hose to allow easy winding. When not in use, roll the hose neatly onto the reel to prevent kinks and tangles. This setup ensures convenient storage and ready access for future use.
4.4 Attaching Nozzles and Accessories
To attach nozzles and accessories, start by ensuring the pressure washer is turned off and the pump is not under pressure. Select the appropriate nozzle for your task (e.g., 25°, 15°, or 0°) and align it with the quick-connect coupler on the spray gun. Push the nozzle firmly until it clicks into place. For additional accessories like spray guns, lances, or brushes, attach them to the end of the hose or spray gun using the provided adapters. Ensure all connections are secure to prevent leaks. Always test the connection before use by pulling gently on the nozzle or accessory. This ensures a proper fit and reliable performance during cleaning tasks.
Operating the Pressure Washer
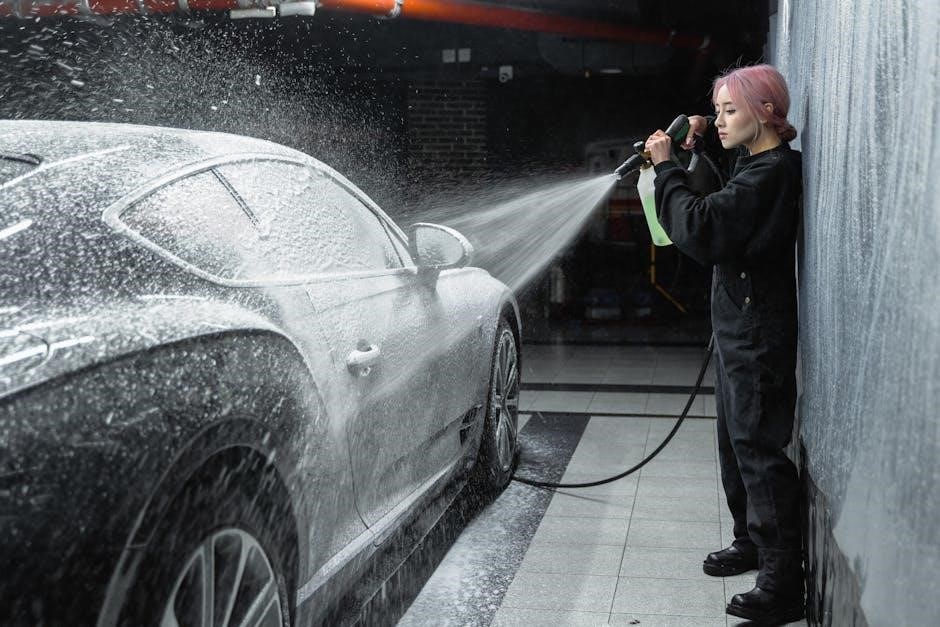
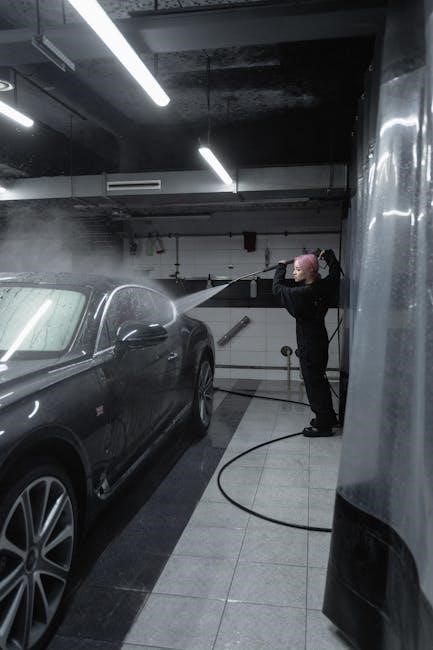
Plug in the unit, turn it on, and use the spray gun to clean surfaces. Adjust pressure settings as needed for different tasks. Always follow safety guidelines to avoid accidents and ensure effective cleaning.
5.1 Getting Started: First-Time Use
Before first use, ensure all parts are properly assembled and connected. Read the manual thoroughly to understand safety guidelines and operation procedures. Unbox and inspect the pressure washer for any damage. Connect the high-pressure hose to both the pump and spray gun securely. Prime the pump by squeezing the trigger to release any air. Plug in the unit and ensure the power source is grounded. Familiarize yourself with the spray gun, nozzle, and detergent tank. Always wear safety goggles and keep the area clear of bystanders. Start with a low-pressure setting to test the unit and gradually adjust as needed for your cleaning task.
5.2 Using Detergent and Soap Nozzle
For effective cleaning, use a pressure washer-specific detergent. Fill the detergent tank with the recommended solution, ensuring not to exceed the maximum level. Attach the soap nozzle (usually marked with a low-pressure setting) to the spray gun. Before applying detergent, rinse the surface with plain water to remove loose debris. Adjust the pressure setting to low to prevent damage. Apply the detergent evenly, working in sections. Allow the solution to sit for 1-3 minutes, then rinse thoroughly with clean water. Always use the correct nozzle type to avoid clogging the system. Regularly clean the detergent tank to prevent residue buildup and maintain performance.
5.3 Adjusting Pressure Settings
Adjusting the pressure settings on your Ryobi pressure washer ensures optimal cleaning for various surfaces. Use the pressure regulator knob to increase or decrease output. Start with lower settings for delicate surfaces like glass or siding. For tougher tasks, such as concrete or heavy stains, higher pressure settings are more effective. Avoid using the highest setting on all surfaces, as it may cause damage or wear out the pump prematurely. Always test a small area first to ensure the pressure is appropriate. Refer to your model’s specifications for exact pressure range limits, as some models may have digital controls for precise adjustment.
5.4 Tips for Effective Cleaning
For effective cleaning with your Ryobi pressure washer, start by selecting the appropriate nozzle for the task. Use a wide-angle nozzle for large surfaces and a narrow nozzle for tough stains. Keep the spray nozzle 12–24 inches away from surfaces to avoid damage. Move the nozzle in a steady, sweeping motion to ensure even cleaning. Pre-treat heavily soiled areas with detergent before rinsing. For best results, use Ryobi-approved cleaning solutions to maintain equipment performance. Regularly flush the system after use to prevent debris buildup. Always clean from the bottom up to avoid dirt runoff onto clean areas. Adjust pressure settings according to surface type to achieve optimal results.

Maintenance and Care
Regular maintenance ensures longevity and efficiency. Check hoses, seals, and nozzles for wear. Clean the filter and pump after use. Store in a dry, protected area.
6.1 Regular Maintenance Tasks
Perform routine checks on the pressure washer to ensure optimal performance; Check the oil level in the pump and top it off if necessary. Inspect hoses and connections for damage or leaks. Clean the filter regularly to prevent clogs and maintain water flow. Remove and clean the nozzle tip to eliminate debris buildup. Replace worn-out seals or O-rings to prevent leaks. After each use, drain the hose to avoid water spots and mineral deposits. Lubricate moving parts periodically to reduce friction and wear. Always follow the manufacturer’s recommendations for maintenance intervals to extend the lifespan of your Ryobi pressure washer.
6.2 Storing the Pressure Washer
Proper storage is essential to maintain your Ryobi pressure washer’s performance and longevity. After use, ensure the unit is clean and dry. Drain all fuel from the tank and run the engine until it stops to prevent stale fuel buildup. Store the pressure washer in a cool, dry place, away from direct sunlight and extreme temperatures. Avoid storing it in damp or humid environments to prevent rust. Secure the hose and accessories neatly to avoid damage. If storing for an extended period, consider using a protective cover. Always follow the manufacturer’s storage guidelines to ensure the unit remains in good condition.
6.3 Winterizing the Unit
Winterizing your Ryobi pressure washer is crucial to protect it from freezing temperatures and ensure optimal performance when you resume use. Start by draining all fuel from the tank and running the engine until it stops to prevent stale fuel buildup. Disconnect and drain the hoses to remove any remaining water. Use a pump saver or RV antifreeze in the pump to prevent freezing. Store the unit in a dry, climate-controlled area, away from direct moisture and freezing conditions; Cover the pump and electrical components to protect them from dust and humidity. This will ensure your pressure washer remains in excellent condition for the next use.

Troubleshooting Common Issues
Identify and resolve common problems like low pressure, motor issues, or leaks. Check connections, ensure proper nozzle use, and consult the troubleshooting guide for detailed solutions.

7.1 Common Problems and Solutions
Common issues with Ryobi pressure washers include low pressure, pump failure, or leaks. For low pressure, check nozzle size and detergent use. If the pump doesn’t start, ensure the GFCI outlet is working and the power cord is securely connected. Leaks often occur from worn seals or loose connections; replace seals and tighten fittings. If the motor is noisy, inspect for blockages or worn components. For the soap dispenser not working, ensure it’s properly attached and the detergent setting is activated. Always refer to the troubleshooting guide in the manual for detailed solutions and maintenance tips to prevent recurring issues.
7.2 Pressure-Related Issues
Pressure-related issues with Ryobi pressure washers often stem from incorrect nozzle usage or pump overload. Low pressure may occur if the wrong nozzle size is used or if there’s a blockage in the hose or gun. To fix this, ensure the nozzle is clean and properly sized for the task. Pressure fluctuations can result from an unstable water supply or a faulty pressure regulator. Check the water source flow rate and inspect the regulator for damage. High pressure settings can damage surfaces, so always start with lower settings and gradually increase as needed. Regular maintenance, such as cleaning the pump and hoses, helps maintain optimal pressure performance.
7.3 Motor or Pump Malfunction
Motor or pump malfunctions in Ryobi pressure washers can occur due to overheating, low water supply, or internal component wear. Symptoms include reduced performance, unusual noises, or complete shutdown. To address this, ensure the water source is adequate and free from restrictions. Check for blockages in the inlet screen or hoses. If the motor overheats, allow it to cool before restarting. Inspect the pump for signs of damage or leaks, and replace worn seals if necessary. Regular lubrication of moving parts and proper storage can prevent such issues. If problems persist, consult a professional or contact Ryobi support for assistance.

Warranty and Support
Ryobi offers a comprehensive warranty program, ensuring customer satisfaction. Dedicated support teams provide assistance, while online resources enhance product maintenance and troubleshooting experiences.
8.1 Understanding the Warranty Coverage
Ryobi pressure washers are backed by a robust warranty program designed to protect your investment. The standard warranty typically covers defects in materials and workmanship for a specified period, usually ranging from 3 to 5 years, depending on the model and components. This coverage includes repairs or replacements of faulty parts at no additional cost. However, the warranty may exclude damage caused by misuse, improper maintenance, or normal wear and tear. Extended warranty options may also be available for purchase. Registering your product is highly recommended to ensure seamless warranty claims and support services.
8.2 Registering Your Product
Registering your Ryobi pressure washer is a straightforward process that ensures warranty validation and access to exclusive customer support. Visit the official Ryobi website and navigate to the product registration section. Create an account or log in if you already have one. Provide your personal details, product information (model number and serial number), and purchase date. Upload a copy of your receipt or invoice for verification. Once completed, you’ll receive confirmation via email. Registration helps Ryobi track your warranty and provides faster assistance for service requests. Regular updates and special offers may also be sent to registered users.
8.3 Contacting Ryobi Customer Service
To contact Ryobi customer service, visit their official website and navigate to the “Support” section. Use the “Contact Us” form to submit inquiries or concerns. You can also reach them via phone by calling the Ryobi customer service hotline at 1-800-525-2579. For faster assistance, have your product’s model number and serial number ready. Additionally, live chat support is available on their website during business hours. For troubleshooting or repair requests, visit the Ryobi service center locator tool. Ensure to have your product registered for streamlined support. Ryobi’s customer service team is available to address warranty claims, repair needs, and technical questions.

Additional Resources
Access parts diagrams, online manuals, and FAQs on Ryobi’s official website. Join community forums for troubleshooting tips and user discussions. Use these resources for enhanced support.
9.1 Parts Diagrams and Lists
Refer to the official Ryobi website or the manual for detailed parts diagrams and lists specific to your pressure washer model. These resources provide a visual breakdown of components, making it easier to identify and order replacement parts. Interactive diagrams often feature clickable elements, allowing users to explore each part’s location and function. Additionally, comprehensive lists include part numbers, descriptions, and quantities, ensuring accurate ordering. These tools are essential for maintenance, repairs, and understanding how components interact. Use them to familiarize yourself with your unit’s structure and streamline any servicing or upgrades.
- Visual identification of components
- Accurate ordering of replacement parts
- Enhanced understanding of unit structure
9.2 Online Manuals and Guides
Ryobi provides comprehensive online manuals and guides for their pressure washers, accessible through their official website. These resources include downloadable PDF versions of the manual, ensuring easy access anytime. Additionally, Ryobi offers interactive guides, troubleshooting tips, and video tutorials to help users optimize their pressure washer’s performance. For model-specific information, users can search using the product’s serial number or model name (e.g., RY1419MTVNM). These online resources are regularly updated, offering the latest tips and maintenance advice. They serve as a valuable supplement to the printed manual, providing a convenient way to explore advanced features and resolve common issues.
- Accessible through Ryobi’s official website
- Includes downloadable PDF manuals
- Interactive guides and video tutorials
- Model-specific support and updates
9.3 Community Forums and FAQs
Ryobi pressure washer users can benefit from active community forums and FAQs available online. These platforms offer a space to discuss product experiences, share tips, and address common queries. Community forums allow users to interact with fellow owners, troubleshooting issues and exchanging advice. FAQs provide quick answers to frequently asked questions, covering topics like maintenance, troubleshooting, and accessory compatibility. These resources foster a supportive community, helping users maximize their pressure washer’s performance. They also serve as a valuable tool for resolving issues without contacting customer service, ensuring a smoother user experience.
- Active forums for user discussions
- FAQs for quick problem-solving
- Community-driven troubleshooting
- Tips and advice from experienced users